
Getting started with POS
What Apexfy POS is, who it's for, how to set it up for your shop and add a cashier, plus common questions.
POS is a point of sale for your physical shop, built into your Apexfy dashboard. It works for any shop: clothing, grocery, pharmacy, accessories or phones. It runs in the browser on a computer, tablet or phone, and it's included in every plan at no extra cost.

Create your point of sale first
The first time you open Point of sale, you'll create it in two steps. The other POS pages show up after that.

- Enter the point of sale name and location name, then click Next.
- Choose what you sell in person:
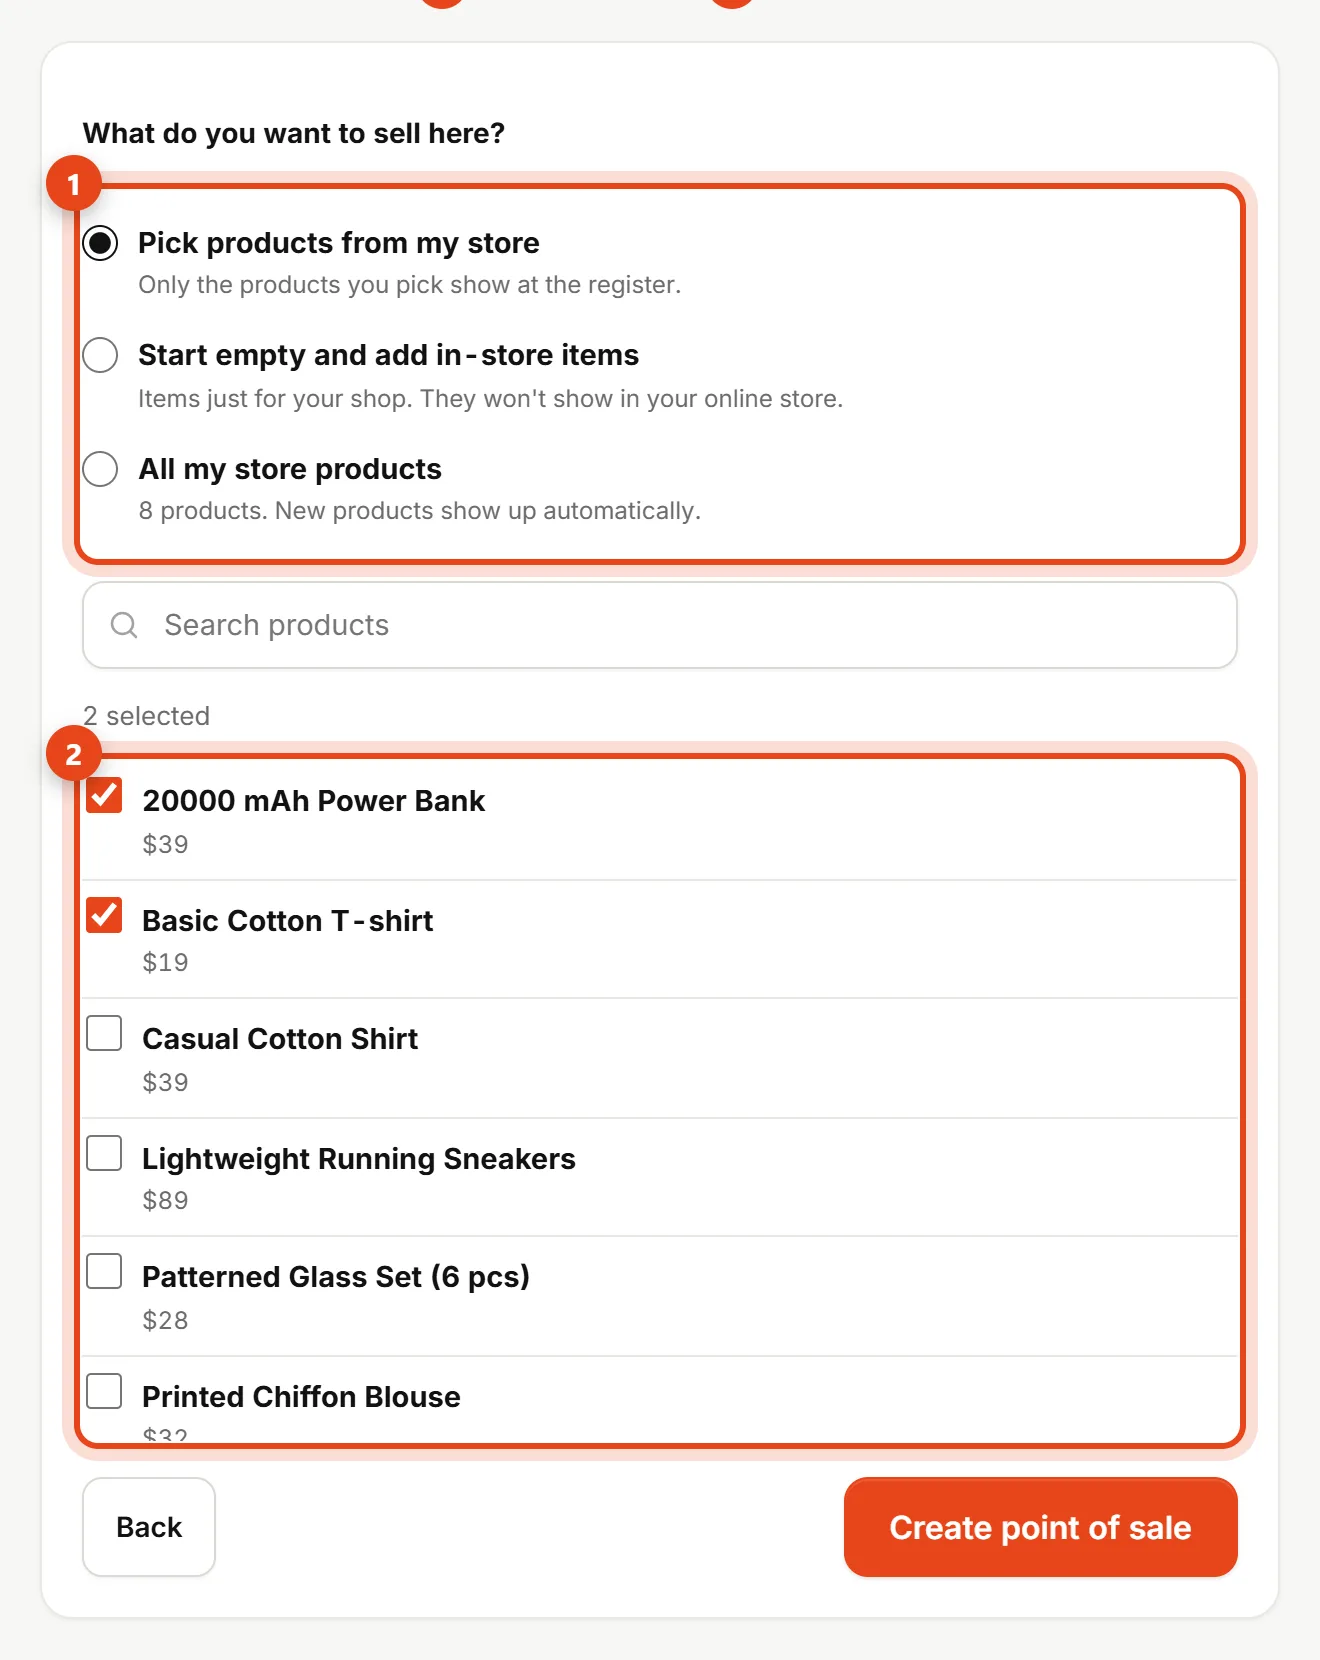
Choose products - Pick products from my store: only the products you pick show at the register.
- Start empty and add in-store items: items just for your shop that don't show in your online store.
- All my store products: every published product shows, and new products show up automatically.
POS products
At Point of sale, click POS products to add or remove products from your store, or to switch between selected products and all products. Each location has its own list, shared by its registers. Pick the location at the top of the window; a new location starts with a copy of your main location's list. You can also set a product's locations from its page.

Click New in-store item to add something that isn't in your online store. It shows at the register only, and in Products with an In-store only label. If you publish it from there, it shows in your store too.
What's in POS
| Page | What it's for |
|---|---|
| Point of sale | Sales, returns and receipts. It keeps working if the internet drops. Selling guide |
| Cash & shifts | Open and close shifts, record expenses and count the drawer. Cash guide |
| Payments & accounts | Split payments, your own payment types, tips, customer accounts and gift cards. Payments guide |
| Loyalty & prices | Receipt design, digital receipts, the customer display, loyalty points and wholesale prices. Loyalty guide |
| E-receipts (Egypt) | Connect the POS to the Egyptian Tax Authority e-receipt system. E-receipt guide |
| Returns, pickup, shipping | Return and exchange online orders at the register, store pickup, sell and ship, and cart links. Online and in store guide |
| Grocery and retail | Selling by weight, scale barcodes, quick keys and barcode labels. Grocery and retail guide |
| Pharmacies and food | Batches with expiry dates, first-expiring sold first, and tracking expired stock. Expiry guide |
| Salons and services | Services with a length, your team, the appointment schedule, and checkout at the register. Appointments guide |
| Staff and payroll | PIN clock-in, time off, advances, and monthly payroll. Staff guide |
| Reports | Sales by staff, location and item, the hourly heat map, and the end-of-day report. Reports guide |
| Restaurants and cafés | Add-ons, tables and open orders, the kitchen display, and separate checks. Restaurant guide |
| Staff | A PIN for each person on a shared device, manager approval, and each person's sales and commission. Staff guide |
| Inventory | Stock at every location, transfers, stock counts and more than one register. Inventory guide |
| Installments | Sell on installments, collect payments and share a link with the customer. Installments guide |
| Repairs | Check devices in, hand them back and track parts. Repairs guide |
| Wallets and POS reports | Mobile-wallet lines and their fees, plus sales and profit reports. Wallets guide |
| Devices (IMEI) | Every unit with its number and history. It shows in the menu once you have a product tracked by serial. Devices guide |
| Purchases & vendors | Purchase bills and each vendor's balance. Purchases guide |
Set up your shop in 4 steps
- Make sure your products have prices and stock, and add a barcode to each one on the product page. POS uses the same products and stock as your online store.
- If you sell items with serial numbers (like phones), turn on Tracked by serial / IMEI on the product page.
- Add your cashier from Team: invite them and give them only the Cashier (point of sale) permission. Team guide
- Open Point of sale, enter the cash in the drawer and click Open shift.
Permissions
- Cashier (point of sale): sells, makes returns, opens and closes shifts and records cash movements. Cashiers can't see product costs or profit.
- Finance: sees cost and profit in reports, and manages purchases, vendors and wallet settings.
- The store owner sees everything.
Common questions
Do in-store sales show up with my online orders? Yes. Every sale appears in Orders and in Analytics under the "In-store (POS)" source, and it comes out of the same stock.
Do I need special hardware? No. Any computer, tablet or phone with a modern browser works.
What if the internet goes down? Keep selling as usual. Sales are saved on the device and sent automatically when you're back online. Installment sales and serial-tracked items need a connection.
Does POS cost extra? No, it's part of your Apexfy plan.