
Inventory, locations and registers
Track every product's stock at each store and warehouse, move stock between locations, run stock counts, and run several registers with their own cash drawers.
Open this page in your dashboardOpen POS → Inventory. Stock shows each product's quantity at every location and in total, the value of your stock at cost, and how many items are running low.
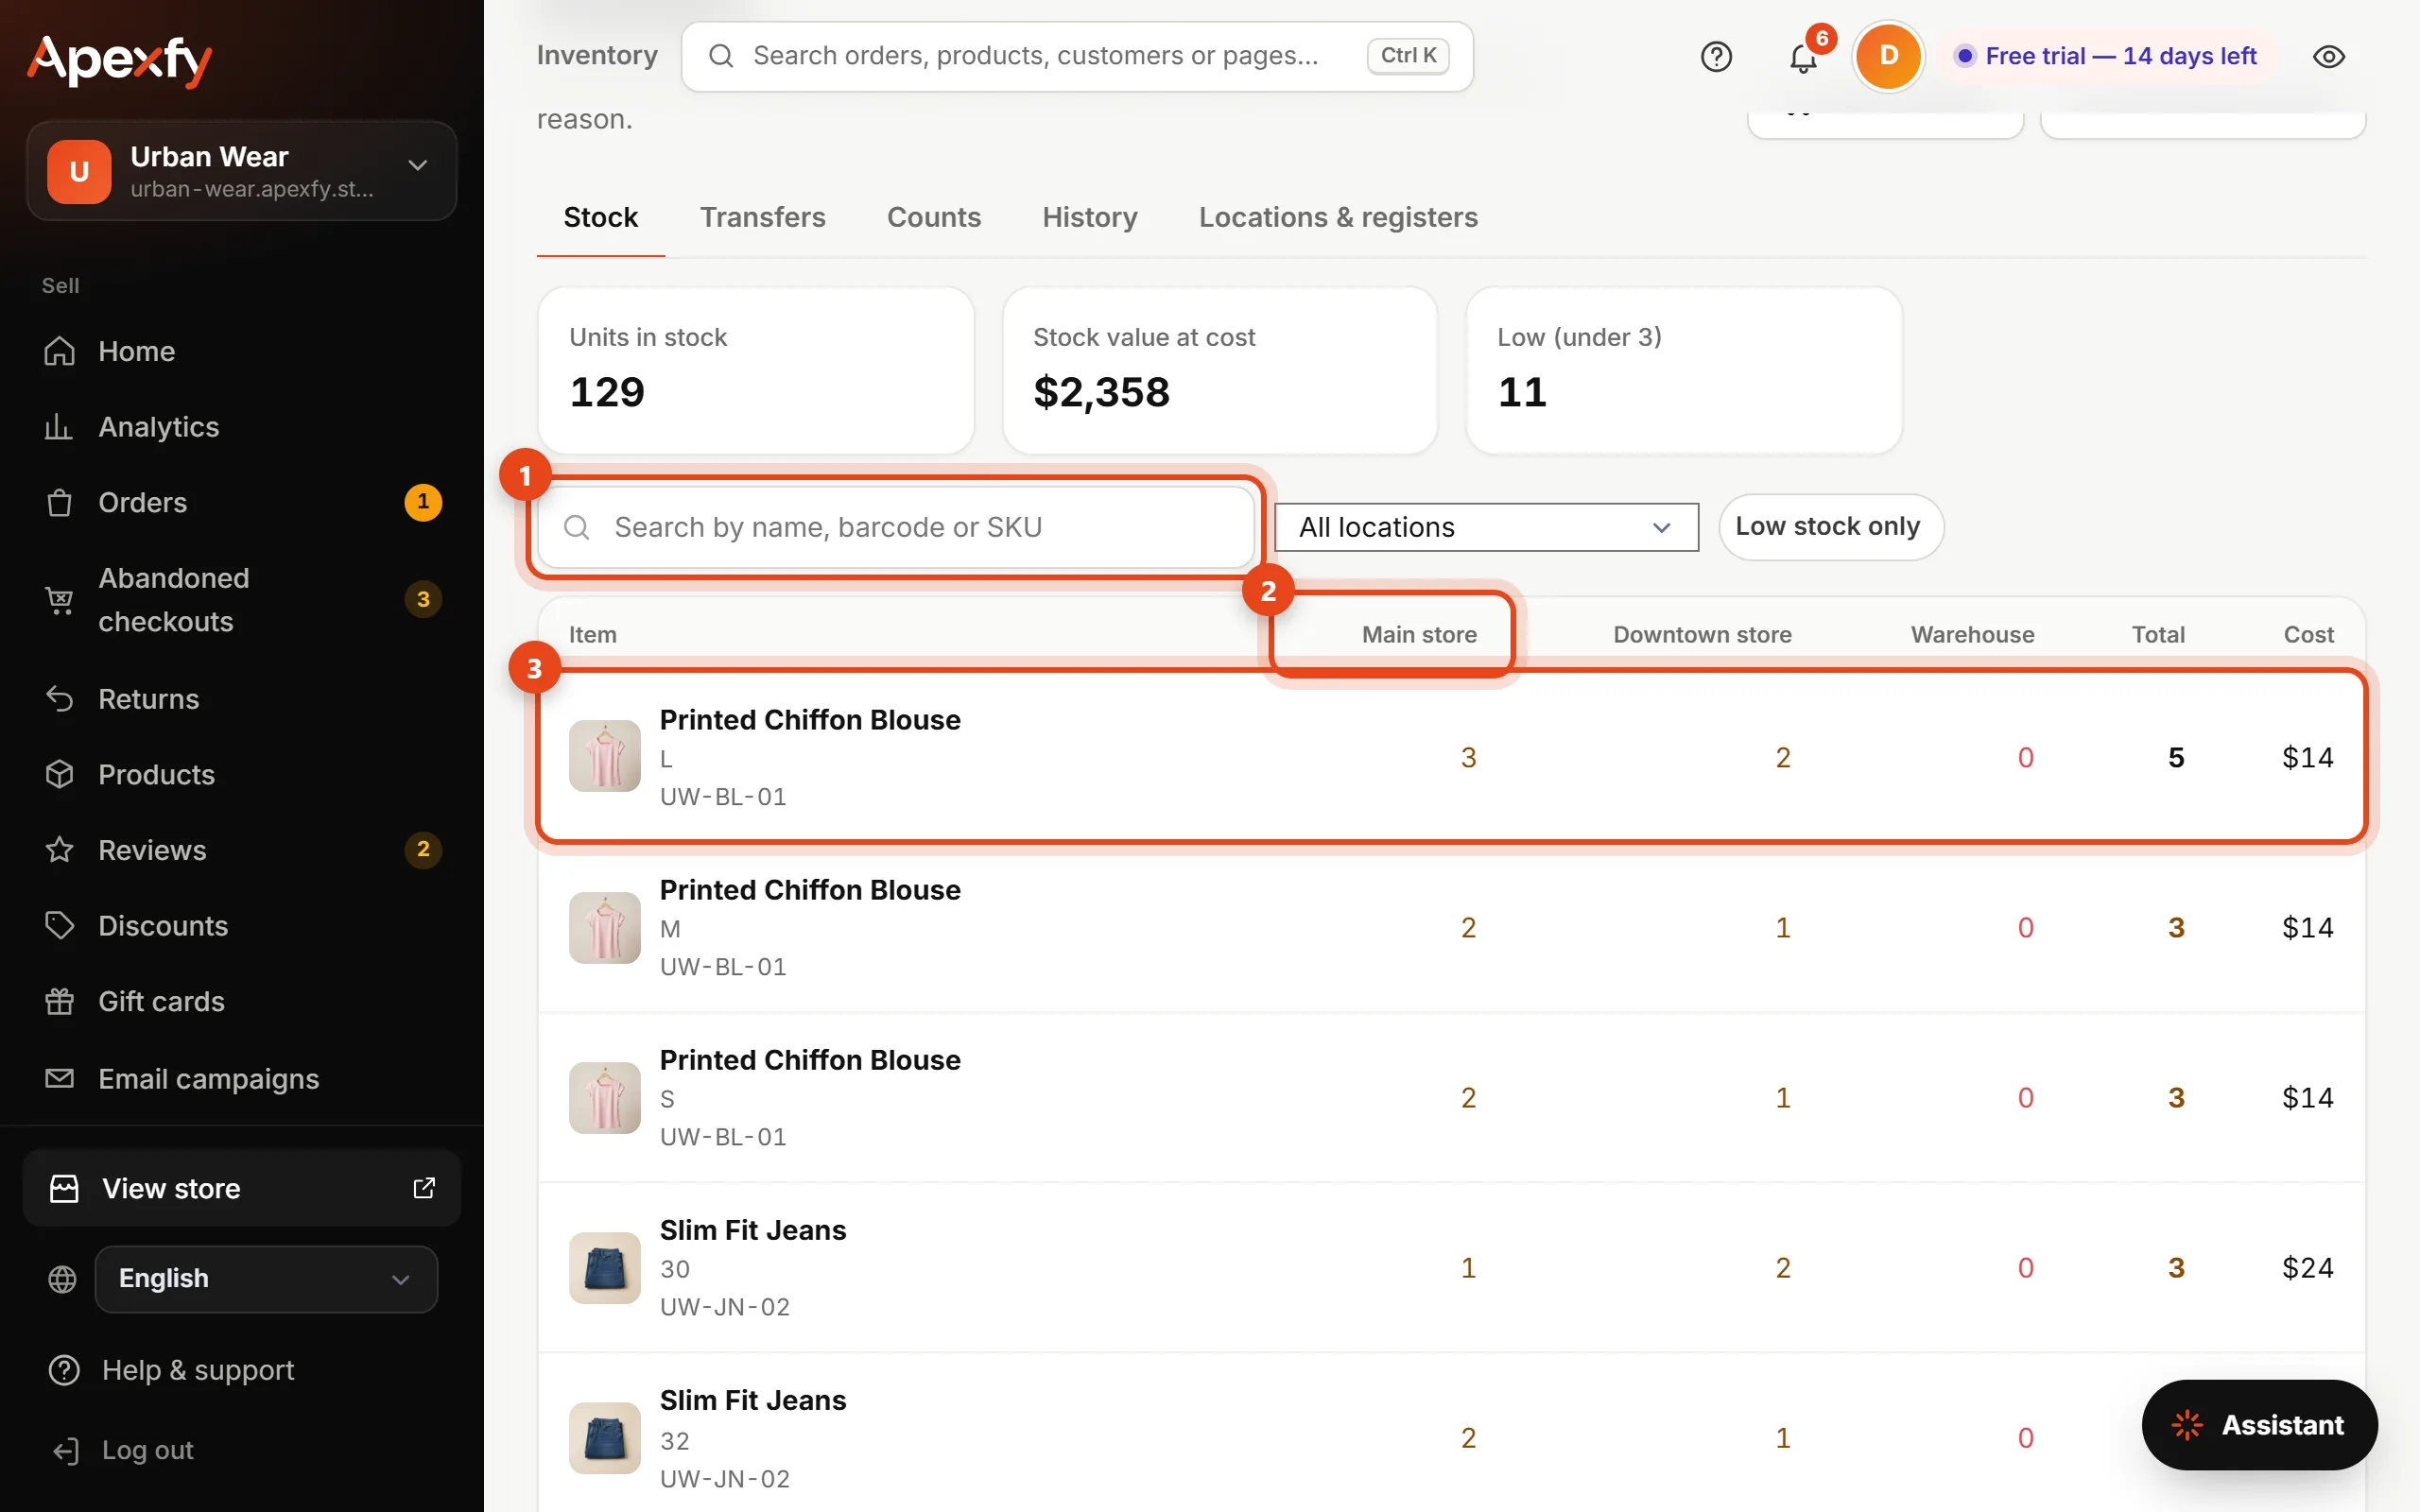
- Search by name, barcode or SKU, pick one location, or click Low stock only.
- Each location has its own column. Red means sold out and orange means low.
- Click any item to Adjust it: enter the correct quantity and pick a reason (damaged, lost, found extra, correction).
Your online store sells from the default location. Each register sells only from its own location's stock, so it can't sell more than that location has, even when the total is enough.
Locations and registers
In Locations & registers, click Add location.
- A Store starts with one register ready to use. A Warehouse holds stock only and has no register.
- Click Register on any location to add another checkout with its own cash drawer and shift.
- A new location starts with zero stock. Move stock to it with a transfer.
On each checkout device, click the register name at the top of Point of sale and choose that device's register. The choice is saved on the device, and each shift closes with its own drawer.
Moving stock between locations

- Choose From and To.
- Search for items, add them and enter the quantity. For serial-tracked items, enter their serial numbers.
- Click Send. Stock leaves the origin right away and the transfer shows as In transit.
At the receiving location, open the transfer and click Confirm receipt. If less arrived, lower the quantity and the shortage is recorded on the transfer.
Stock counts
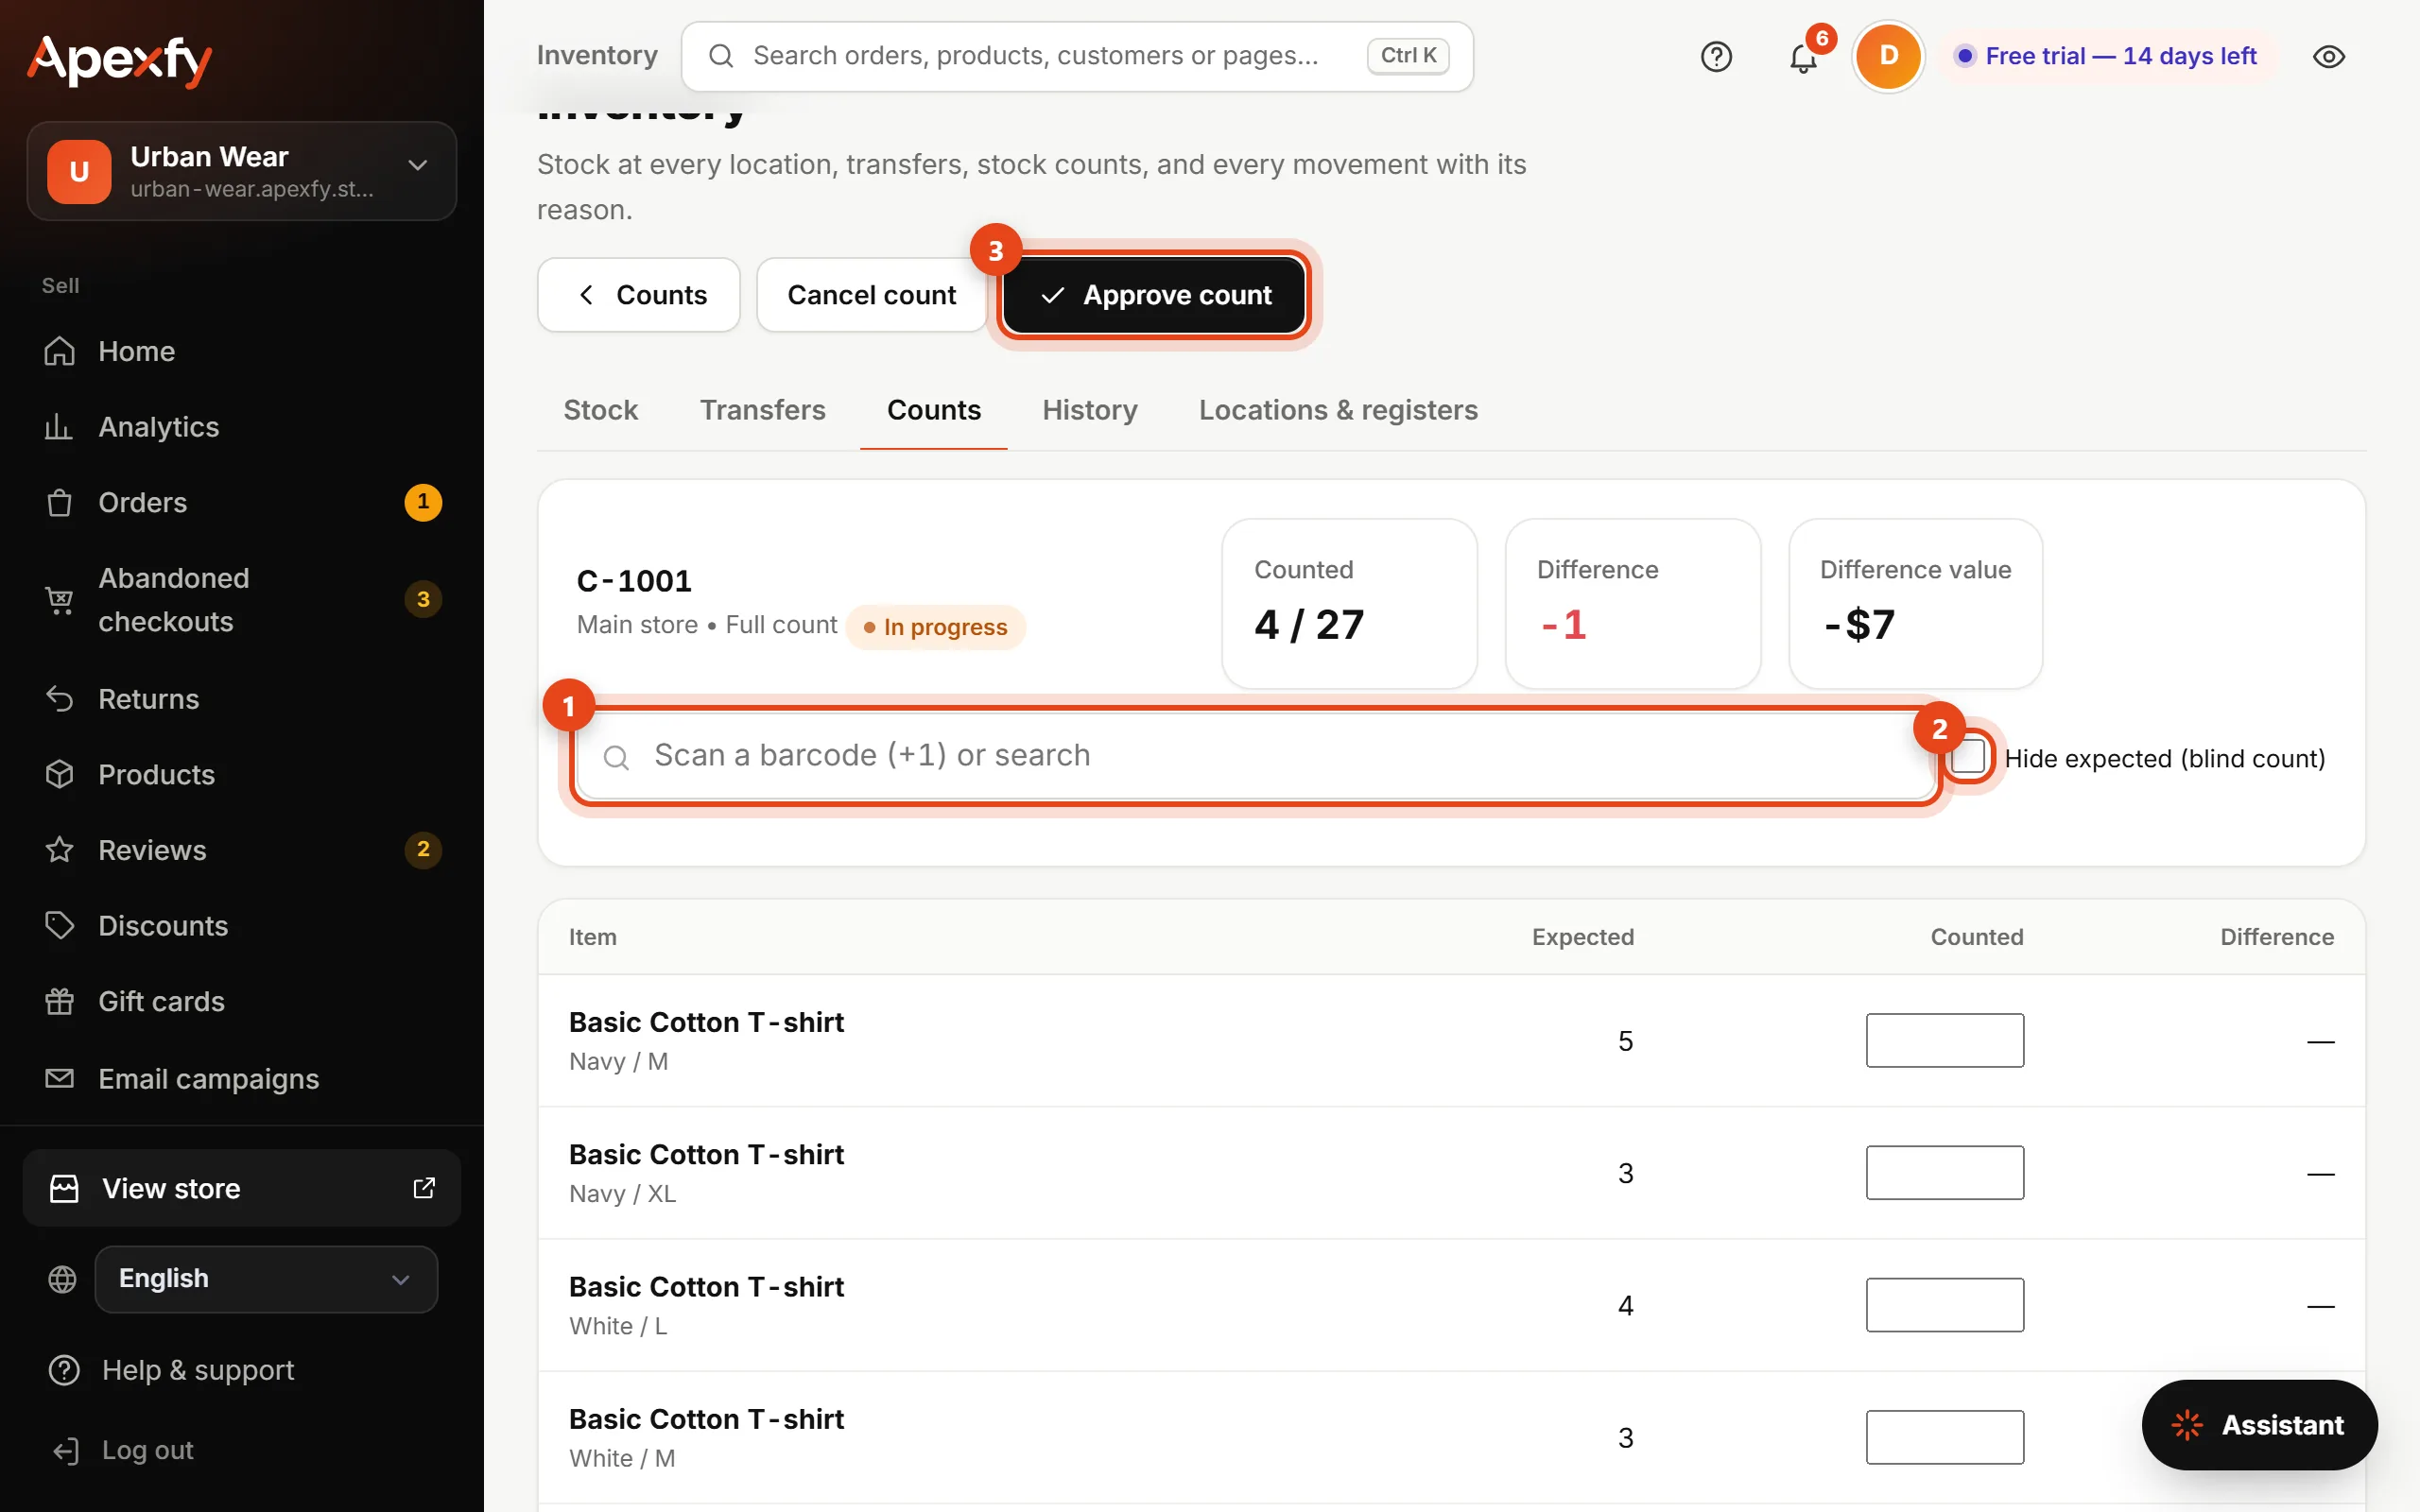
- Click New stock count and choose the location, then Full count for every product or Partial count for a shelf or section.
- Scan each item's barcode (each scan adds 1) or type the quantity next to the item. Turn on Hide expected if you want staff to count without seeing the stock on record.
- Click Approve count. Stock changes by the difference, and you see the value of any shortage or overage at cost.
Items you don't count stay the same. You can keep selling during a count, and the difference is measured against the stock when the count started.
History
History lists every stock change: POS sales, online orders, transfers, adjustments and counts. Each one shows the quantity, the stock after it, the reason, the reference number and who made it.
Permissions
- Cashiers can see stock, receive transfers and count items.
- Products permission can adjust stock, send transfers and approve counts.
- Settings permission can add locations and registers.
- Stock value at cost only shows to staff with the Finance permission.