
Shipping carriers and labels
Connect your carrier account (Shippo, EasyPost, Sendcloud, Shiprocket, OTO, Aramex or Bosta) and create labels from the order page in one click. The tracking number comes back on its own and the order is marked shipped.
Instead of retyping every order on the carrier's website, connect your account once and create labels right from the order page.
| Carrier | Ships to | Payment |
|---|---|---|
| Shippo | The US and most countries, through USPS, UPS, FedEx, DHL Express, Canada Post and Australia Post | Pick a service and rate; it's charged to your Shippo account |
| EasyPost | The US, Canada, the UK, Australia and 100+ carriers including Purolator, Royal Mail and DPD | Pick a service and rate; it's charged to your EasyPost account |
| Sendcloud | Europe and the UK: PostNL, DHL, DPD, GLS, Colissimo, Correos, Poste Italiane, Evri and more | The carrier and service come from the shipping rules in your Sendcloud account |
| Shiprocket | India: Delhivery, Blue Dart, Xpressbees, Ekart and more | Pick a courier and rate, with cash on delivery |
| OTO | Saudi Arabia and the Gulf: SMSA, Aramex, Saudi Post (SPL), J&T, Naqel and more from one account | Pick a carrier and rate; it's charged to your OTO balance |
| Aramex | The Gulf, Middle East and Egypt (your own Aramex account) | Cash on delivery carries over; pricing follows your Aramex contract |
| Bosta | Egypt only | Cash on delivery carries over to the shipment |
Carriers that serve your store's countries show first; the rest are under Carriers for other countries. Carriers marked Beta are new integrations, so try one order first.
Connect a carrier
Open Shipping and scroll to Shipping carriers & labels.
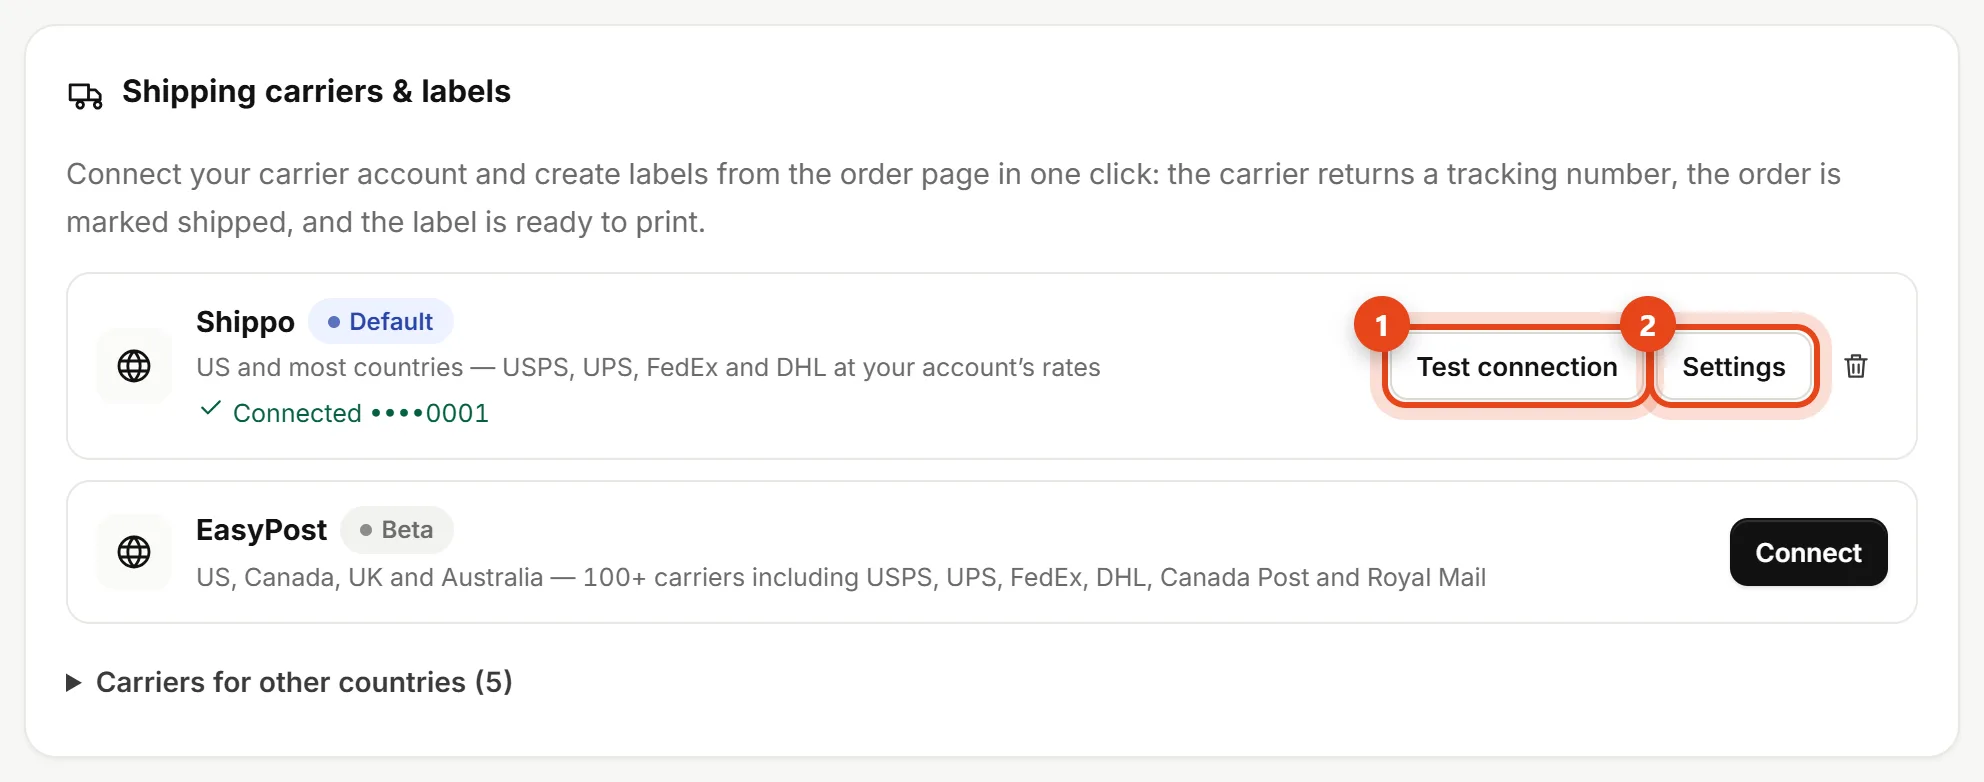
- Click Connect next to the carrier.
- Paste your credentials from the carrier account: an API key for most carriers, the public and secret keys for Sendcloud, an API user for Shiprocket, the refresh token for OTO, and your user name, password, PIN and account number for Aramex. Open the API page takes you to your account. Credentials are stored encrypted, are never shown again, and only the store owner can add them.
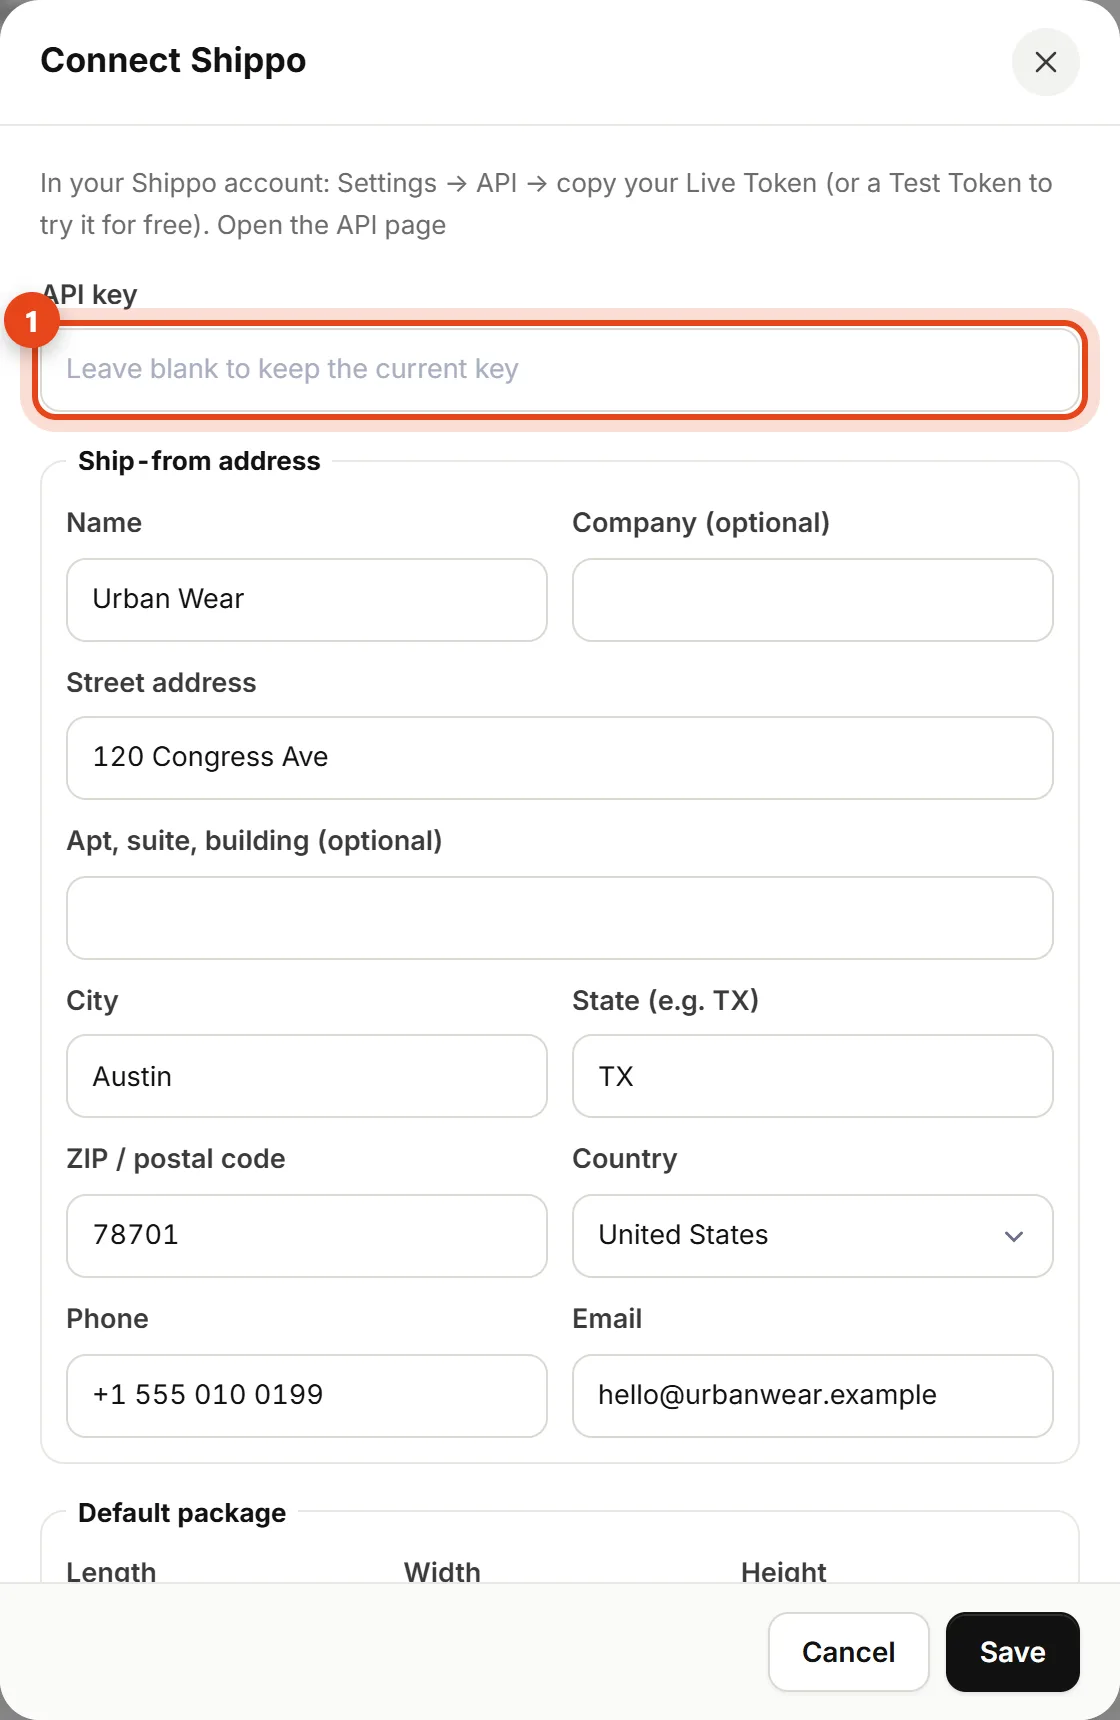
The connect window - Complete the carrier settings: the ship-from address for Shippo, EasyPost and Aramex, the pickup location and its city for OTO and Shiprocket, and your default package dimensions. Weight comes from the product weights in each order.
- For Bosta, pick the package size and choose whether customers can open the package before accepting it.
- Click Connect. We test the key with the carrier right away and show Connected or what went wrong.
Create a label for an order
Labels are for confirmed orders that haven't shipped yet.
- Open the order and click Create label.
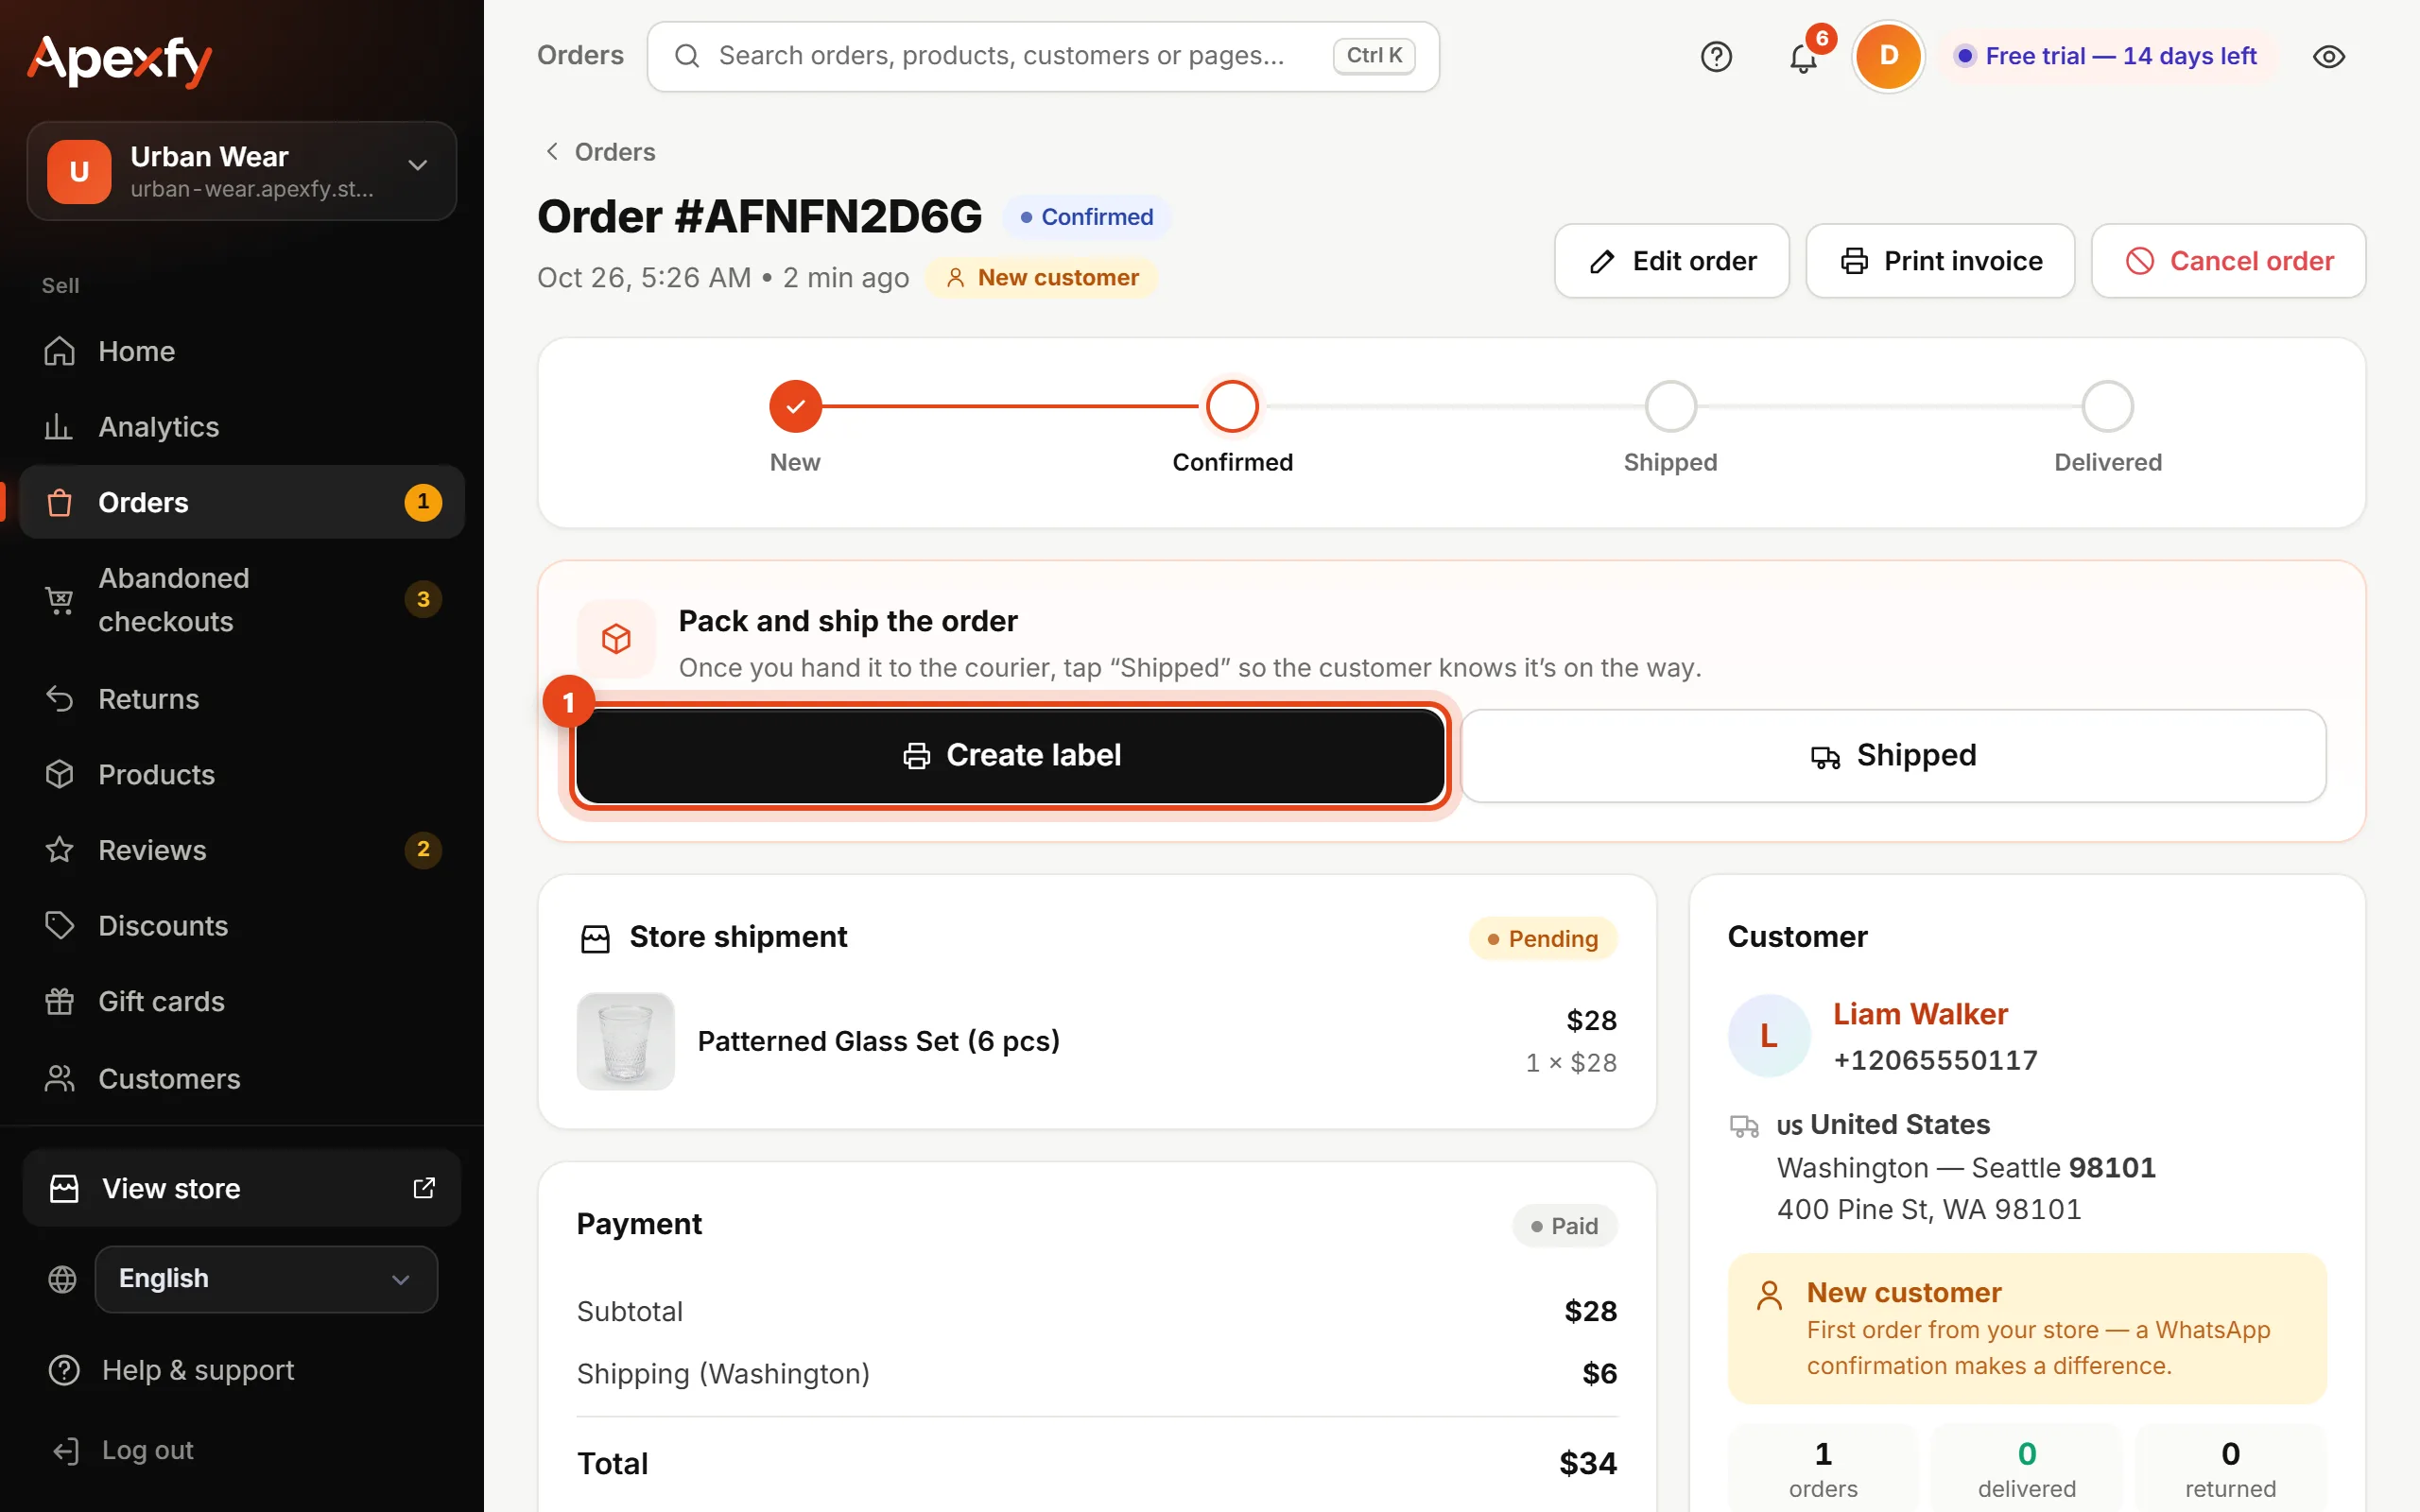
Create label on the order page - If you connected more than one carrier, pick the carrier first.
Shippo, EasyPost, OTO and Shiprocket: you'll see the services available for the customer's address, cheapest first. Pick one and click Buy label.
Bosta, Aramex and Sendcloud: check the cash to collect, add a note for the courier if you like, then click Create shipment.
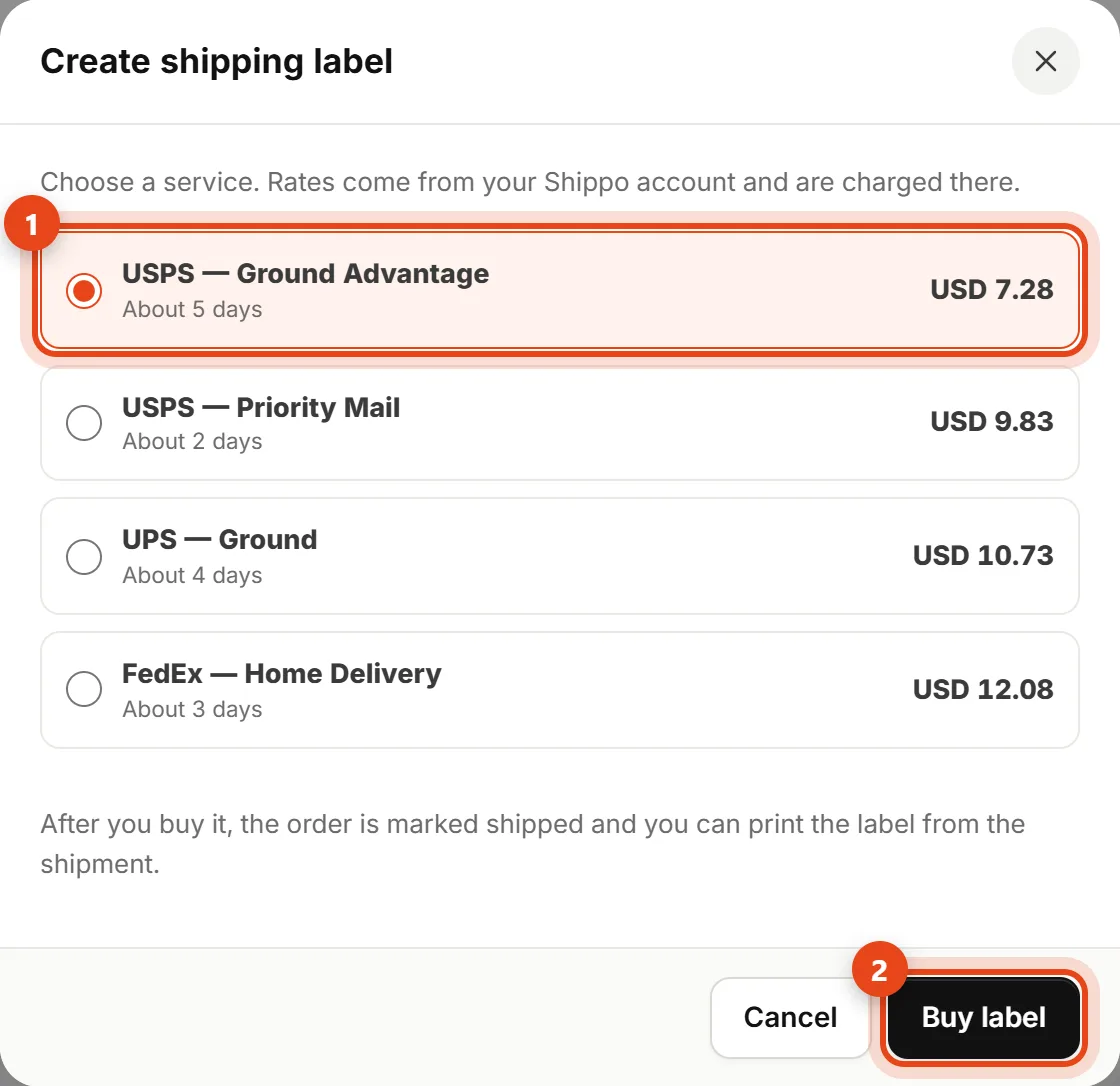
Choosing a service - The tracking number comes back on its own, the order is marked shipped, and the customer gets the shipping email if it's turned on.
- Click Print label on the shipment card and stick it on the package.
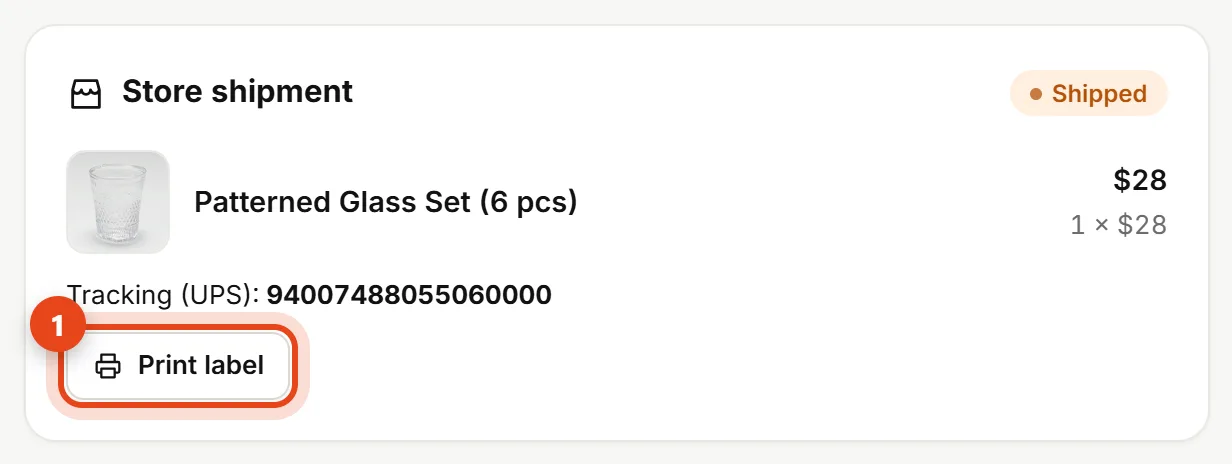
Print the label
Show real carrier rates at checkout
With Shippo, EasyPost, OTO and Shiprocket, customers can see the carrier's real rates for their address and order weight, and pick the service themselves (like standard or express).
- Click Settings next to the carrier, and under Rates at checkout turn on Show this carrier's live rates to customers at checkout.
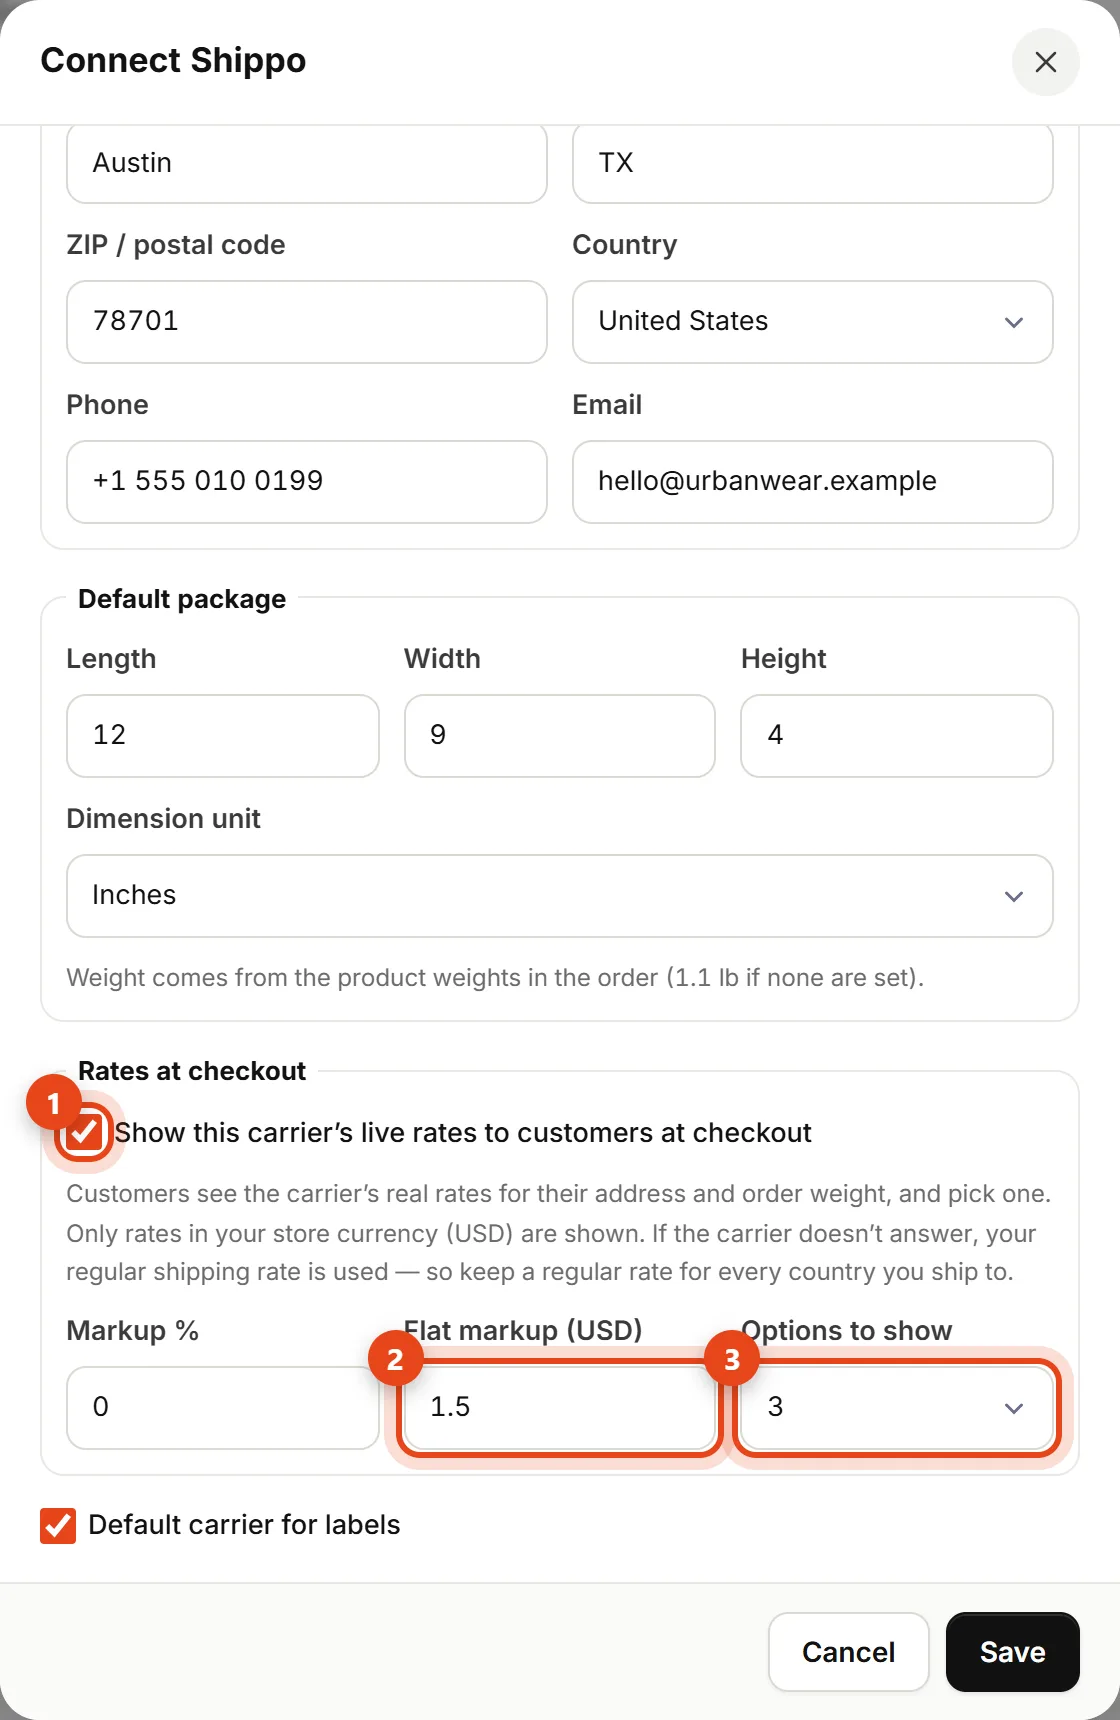
Rates at checkout - Optionally add a Markup % or a Flat markup on top of the carrier's price (to cover packaging, for example), and choose how many Options to show.
- Click Save. The carrier now shows an At checkout badge.
From then on, once a customer picks their state (and enters a ZIP code where it's needed), they see a Shipping method list with prices, and the total uses the service they chose. When you Create label for that order, we pick the same service for you and mark it "Customer's choice".
Delivery updates on their own
With Shippo, EasyPost or Bosta labels, we check each shipment with the carrier every few hours. When the carrier marks it delivered, the order becomes Delivered and the customer gets the delivery email; if it's sent back, the order becomes Returned. You'll see "Automatic update from the carrier" in the order history. Other carriers: update the status yourself as usual.
Return labels
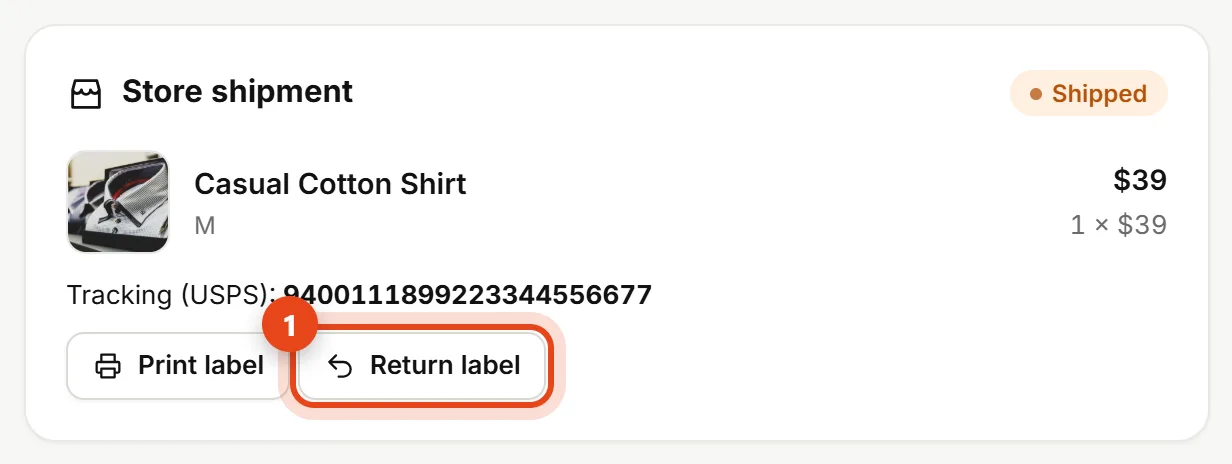
For an order shipped with Shippo or EasyPost, open it and click Return label (1) on the shipment card. We create a label from your customer's address back to your ship-from address with the same carrier; send it to the customer to stick on the package. The button then opens that label.
Common questions
- "No rates for this address"? The ZIP code or state on the order is usually missing or wrong. Contact the customer to confirm the address, then create the shipment on the carrier’s website and click Shipped with the tracking number.
- "The carrier rejected the API key"? Copy the key again from your carrier account, click Settings and paste it. In Shippo, make sure you copied the Live Token for real shipments.
- OTO says the carrier is preparing the label? OTO books the shipment with the delivery company in the background. Click Print label in a minute to get the label and mark the order Shipped.
- The label was created but the order status didn't change? You'll see the reason. The tracking number is saved on the order, and you can click Shipped yourself.
- Local pickup and wholesale items? They don't need a label: customers collect pickup orders, and Apex ships wholesale items.
- Using a different carrier? Click Shipped and type the carrier and tracking number yourself, as in Confirm, ship and deliver orders.